How to configure your invoice settings:
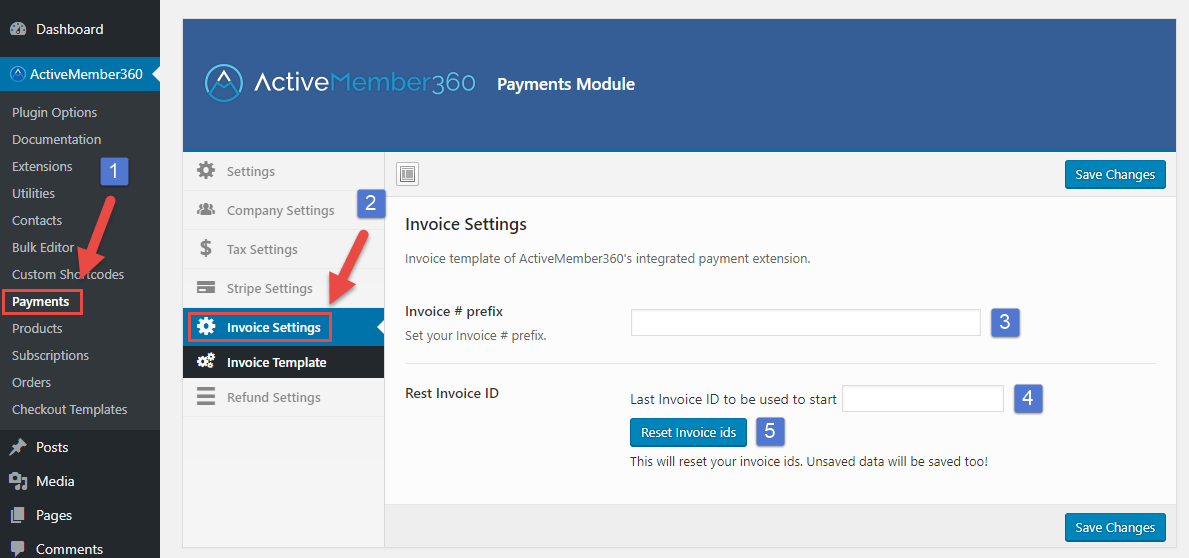
- Click on “Payments” in the ActiveMember360 menu on your left-hand side.
- Click on the “Invoice Settings” section inside the “Payments Module” interface.
- Enter your invoice ID prefix if you need one e.g. “AM360-“. The invoice ID to be appear on invoices and refund receipts will be for this example “AM360-1 or “AM360-1234”. Leave it empty, if you don’t need a invoice prefix, your invoice ID’s will be then just “1” or “1234”.
- If you want to start your invoice ID’s, let’s say with 100, enter 99 in this field. The next invoice created will be ID 100. If you wish to reset your invoice numbers after testing and you need to restart with invoice id 1, enter 0.
- If you want to reset your invoice ID’s and you have entered a number in step 4, click on “Reset Invoice ID’s”. Please note, clicking this button will also save your changes.
Don’t forget to save your changes!