How to create a product:
Step 1
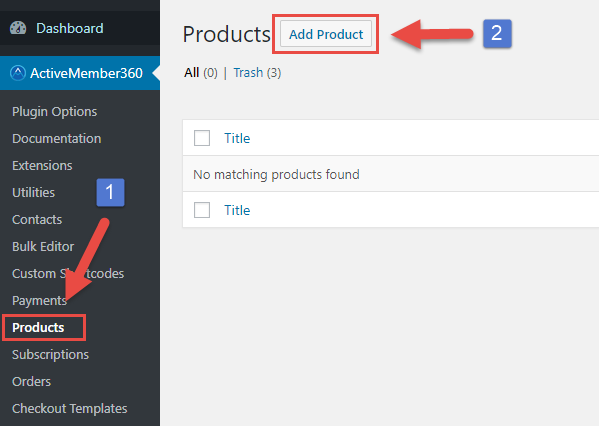
- Click on “Products” in the ActiveMember360 menu in the left-hand menu sidebar.
- Click on “Add Product”.
Step 2
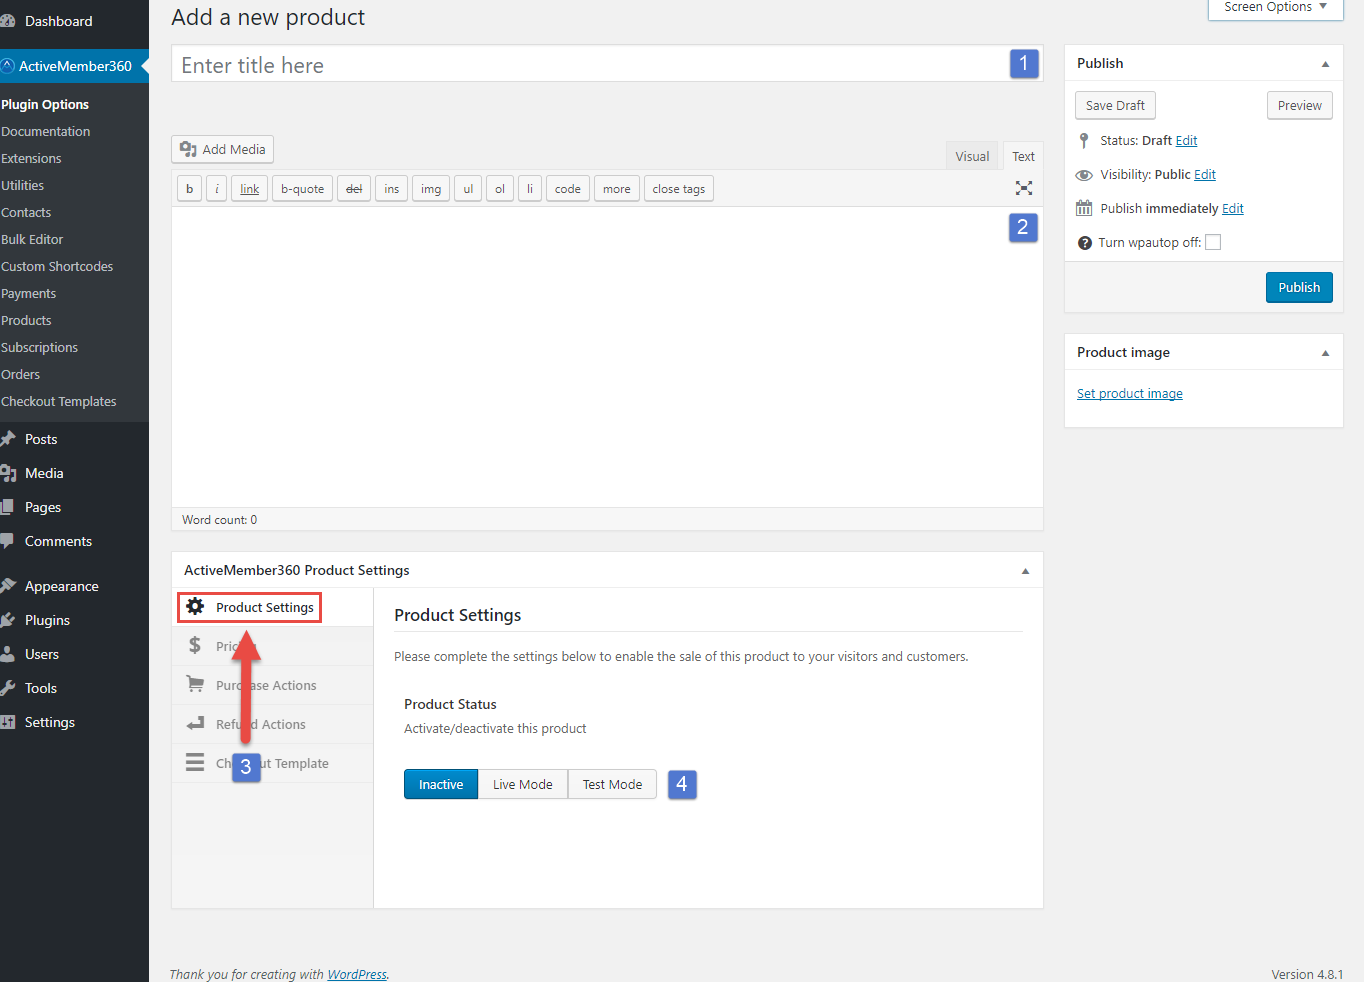
- Enter your product name.
- Enter your product description.
- Click on the “Product Settings” section tab.
- Activate your product by choosing “Live Mode” or “Test Mode” or deactivate by choosing “Inactive”.
Step 3
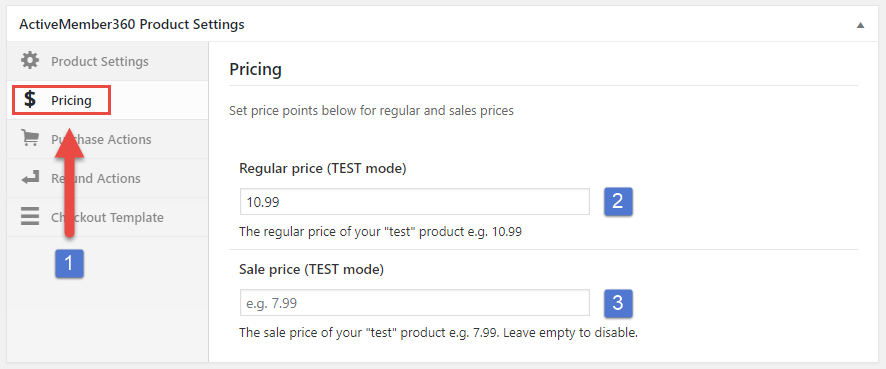
- Click on the “Pricing” section tab.
- Define your “Regular Price”. This price will be displayed and charged as long as no “Sale Price” is defined.
- Define your “Sale Price” if needed. If a “Sale Price” is defined, it will replace your Regular Price”.
Note:
You need to define your “Regular/Sale Prices” in “Test Mode” and in “Live Mode”. Only defining your prices in “Test mode” and later switching to “Live Mode” won’t work and vice versa.
You need to define your “Regular/Sale Prices” in “Test Mode” and in “Live Mode”. Only defining your prices in “Test mode” and later switching to “Live Mode” won’t work and vice versa.
Step 4
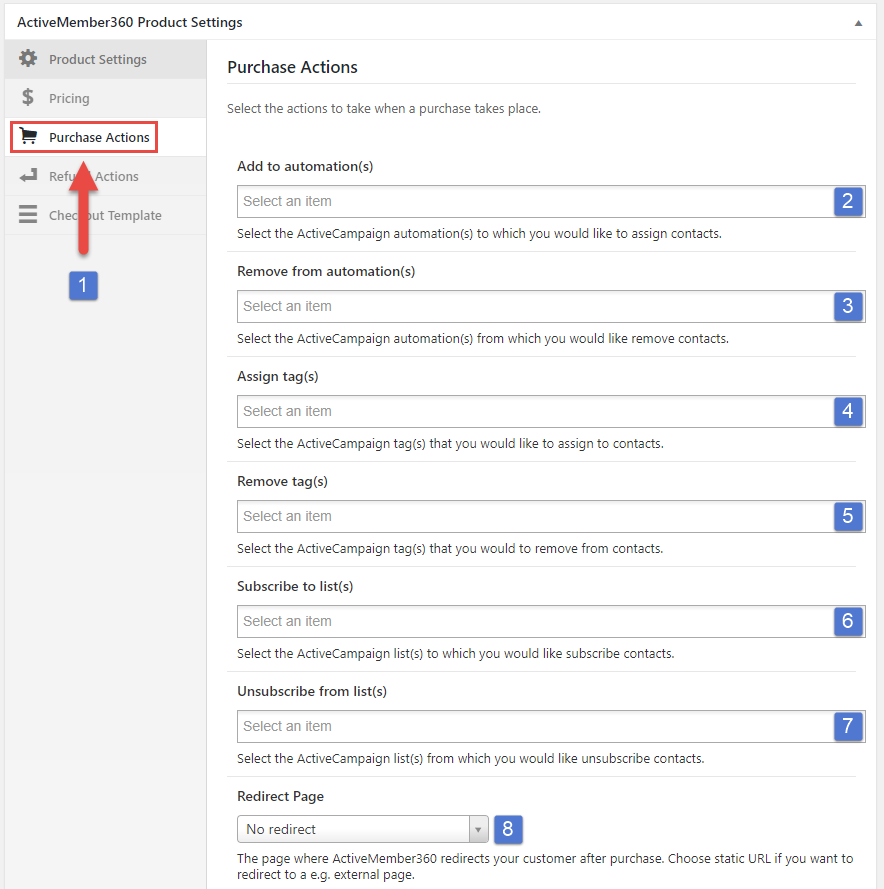
- Click on the “Purchase Actions” section tab.
- Select one or multiple automations to add to the contact record in ActiveCampaign after a successul purchase.
- Select one or multiple automations to remove from the contact record in ActiveCampaign after a successul purchase.
- Select one or multiple tags which should be assigned to the contact record in ActiveCampaign after a successful purchase.
- Select one or multiple tags which should be removed from the contact record in ActiveCampaign after a successful purchase.
- Select one or multiple lists which the contact should be subscribed to in ActiveCampaign after a successful purchase.
- Select one or multiple lists which the contact should be unsubscribed from in ActiveCampaign after a successful purchase.
- Select your redirect page to which the customer should be sent to after a successful purchase.
Step 5
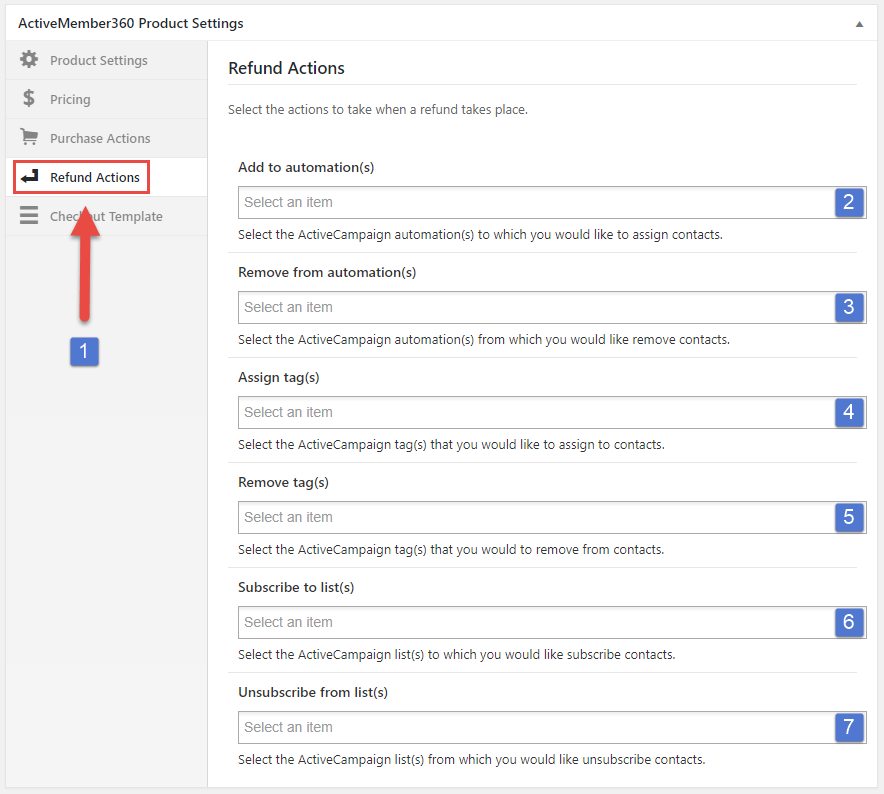
- Click on the “Refund Actions” section tab.
- Select one or multiple automations to add to the contact record in ActiveCampaign after a full refund took place.
- Select one or multiple automations to remove from the contact record in ActiveCampaign after a full refund took place.
- Select one or multiple tags which should be assigned to the contact record in ActiveCampaign after a full refund took place.
- Select one or multiple tags which should be removed from the contact record in ActiveCampaign after a full refund took place.
- Select one or multiple lists which the contact should be subscribed to in ActiveCampaign after a full refund took place.
- Select one or multiple lists which the contact should be unsubscribed from in ActiveCampaign after a full refund took place.
Note:
This refund actions triggers when the payment related to this product was fully refunded. Fully refunded means either you made a “full refund” or you made multiple “partial refunds” against the payment which covers in addition the full amount. They do not trigger if you made a single “partial refund” against the product’s payment which does not cover the full amount.
This refund actions triggers when the payment related to this product was fully refunded. Fully refunded means either you made a “full refund” or you made multiple “partial refunds” against the payment which covers in addition the full amount. They do not trigger if you made a single “partial refund” against the product’s payment which does not cover the full amount.
Refunds would be made through your Stripe account interface.
Step 6
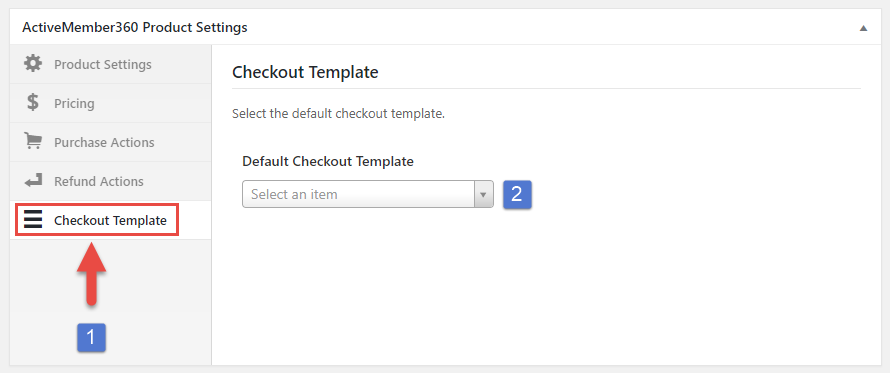
- Click on the “Checkout Template” section tab.
- Choose a template from the dropdown, which you have previously created, see How to create a checkout template.
Don’t forget to save your changes!
Your product is now set up
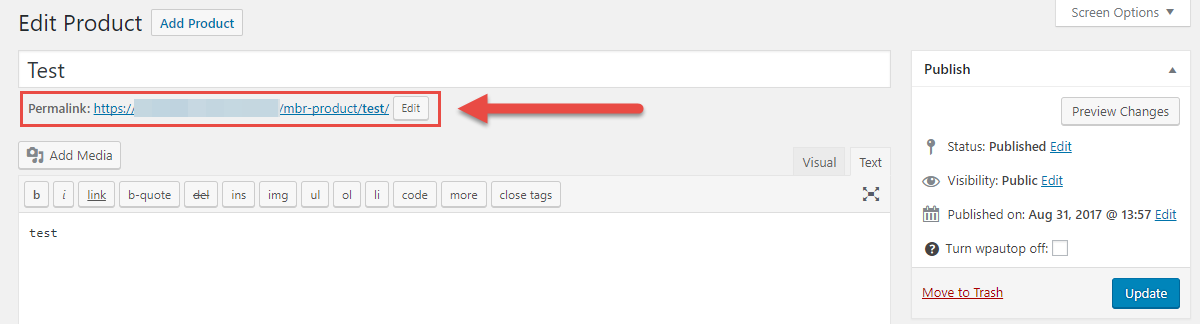
Your product is now set up and can be accessed under the URL inside the red frame.