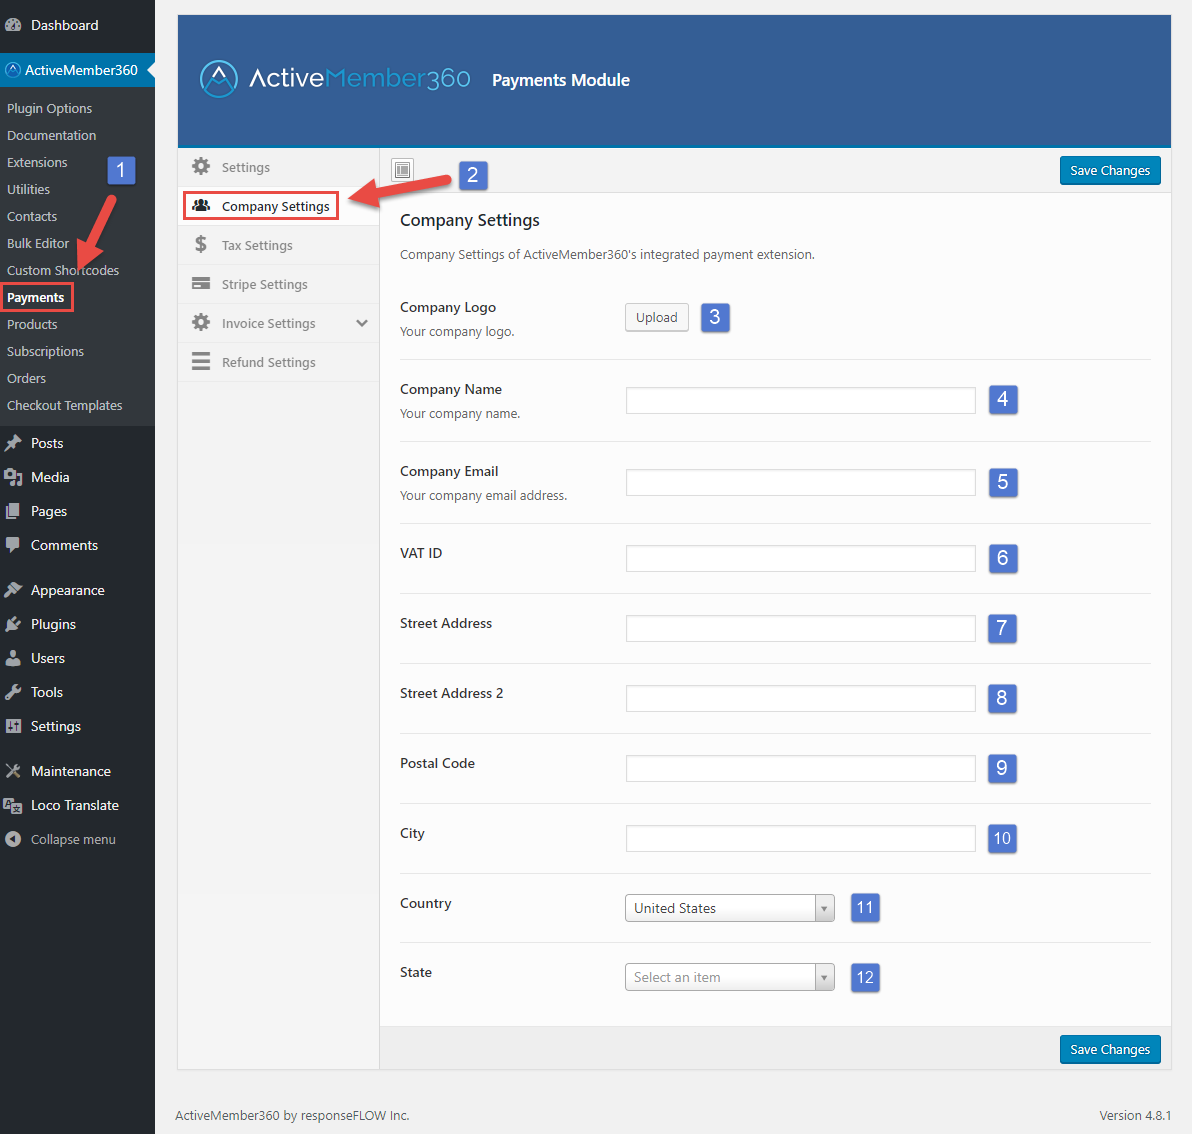
Set up your company details, which will be on your invoices and refund receipts. Some settings will be sales tax relevant.
Steps 3 to 12 can be displayed with placeholders on your invoices and refund receipts, see Invoice Template and Refund Template
Step 11 and step 12 are relevant for your sales tax defined in the section “Tax Settings”.
Step 11 and step 12 are relevant for your sales tax defined in the section “Tax Settings”.
- Click on “Payments” in the ActiveMember360 menu on your left-hand menu sidebar.
- Click on the “Company Settings” section inside the “Payments Module” interface.
- Upload or choose your company logo to appear on invoices and refund receipts.
- Enter your company name.
- Enter your company email address.
- Provide your VAT ID if needed.
- Provide your street address 1.
- Provide your street address 2, if needed.
- Enter your postal/zip code.
- Enter your city.
- Select your country from the dropdown.
Note: This is sales tax relevant. - Select your state from the dropdown, if you have chosen “United States” in the previous step. Otherwise, this field will not be visible.
Note: This is sales tax relevant if you’re based in the U.S.
Don’t forget to save your changes!

